THE DAKOTA COOKING FIRE/FIELD OVEN.
INTRODUCTION.
Fire can make the difference between life and death!
It provides warmth to maintain body temperature, and can boil surface water to kill bacteria and viruses, as well as prepare water and food. It can also dry clothing and equipment. Be careful with leather boots, which shrink if dried rapidly, and Cordura nylon gear, which can melt or scorch.
In an emergency, the fire can also be used as a signal fire, this to call in help. Then make sure that wet grass, wet branches, wet clothing, oil etc. are thrown on to produce heavy smoke. This smoke is visible from a long distance. Also make the ground/air signs for emergency aid!
NOTE: Keep the fire small and manageable, and consider your own safety and that of others!
What equipment should we prepare for a good fire?
IGNITION SOURCES:
COMBUSTIBLE MATERIAL:
Dry ignition material (tinder): fine dry grass, straw, hay, rotten wood, finely cut or crushed tree bark, preferably oily white birch bark, plant fluff such as reedmace, bird-nest material, shredded wood, old clothes, cotton wool from a first aid kit with petroleum jelly, powder from a cartridge, shoe polish, resin balls and animal fat.
Kindling:Fine, thin intermediate materials such as dry, finely shaved twigs or fire sticks, dry ferns and stems help the burning tinder develop into a fire capable of igniting coarser, thicker fuel.
Fuels: dry, hard wood is preferred, but basically everything that is flammable is suitable. First always use dry wood as an inner layer, then wetter wood from the inside out, which dries through the heat of the fire. Manure, bird nests, peat/turf burn well. As well as Esbit cubes and animal fats with wood.
PURPOSE OF THE DAKOTA COOKING FIRE/FIELD OVEN:
- Less visible (little smoke during the day and less blaze during darkness),
- Gets very hot and saves fuel.
- Less weather and wind sensitive.
BUILDING A FIRE.
MAKING THE DAKOTA COOKING FIRE/FIELD OVEN.
a. The Dakota cooker/field oven can be dug at any place.
b. Remove any combustible vegetation around the Dakota cooker/field oven.
c. Preferably dig the Dakota cooking fire/field oven in firm ground, otherwise it will collapse.
d. Its inlet must face the wind to create a good draught, the “chimney effect”!
To determine wind direction, watch moving twigs and grass, wind indicators, moving clouds, fine sand thrown into the air, dust clouds, or the direction of a puff of talc sprayed from a foot-powder container. A wet finger can also help.
e. The cooking utensils used determine the size/diameter of the hole/slot.
1. For standard military mess tins, I use an entrenching tool, twisting or drilling clockwise to make two vertical holes directly opposite each other, approximately 25-30 cm apart.
2. The depth of this I make approx. 25-30 cm, this to prevent sinking of the Dakota cooking fire/field oven.
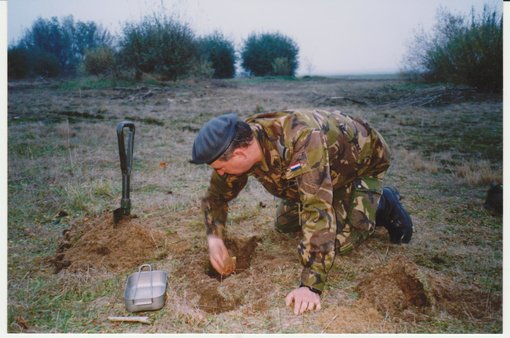
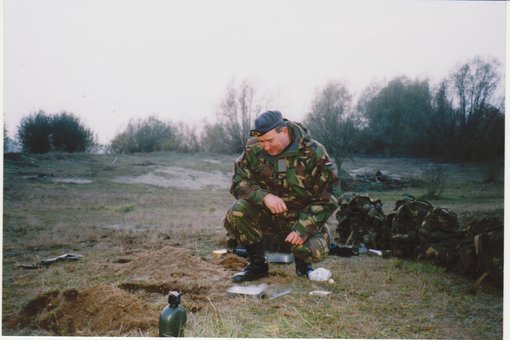
3. At the bottom, 25-30 cm deep, I use an issued spoon or my bare hand to dig a horizontal connecting tunnel, 15-20 cm in diameter, between the two vertical holes (photo 1).
4. I angle the windward hole quite sharply to improve the draught and “chimney effect” (see photo 2).
5. Place tinder and kindling at the bottom of the opposite hole and light them. Rising warm air from the Dakota fire draws cold air through the connecting tunnel from the other hole, feeding the fire.
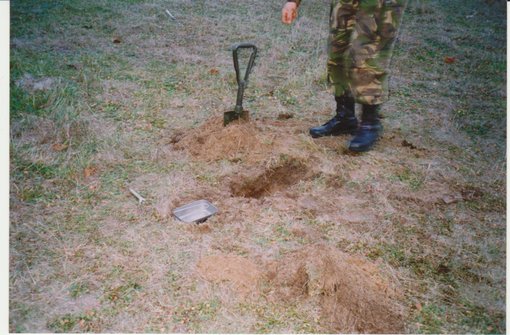
6. Now the Dakota fire in the hole can be built with the fuel.
7. The large bowl/mess-tin is now placed above the fire (see photo 2).
8. You can now cook your meal or boil water (see photo 3).
 Lees in het Nederlands


 15% off
 15% off